
Caulking, Weatherstripping, and the Boring Wins
 Kaushik Kyada
July 10, 2026
7 min read
Kaushik Kyada
July 10, 2026
7 min read

Nobody frames a bead of caulk to hang on the wall. A tube of sealant and a roll of weatherstripping stay the most under-celebrated upgrade in any tiny home: cheap materials, approachable work, and results that hold for years. The catch is that “easy” is not the same as “casual.” A tiny home has so little interior volume that every quarter-inch gap counts for more than it would in a 2,000 square foot house, so the small jobs deserve real attention.
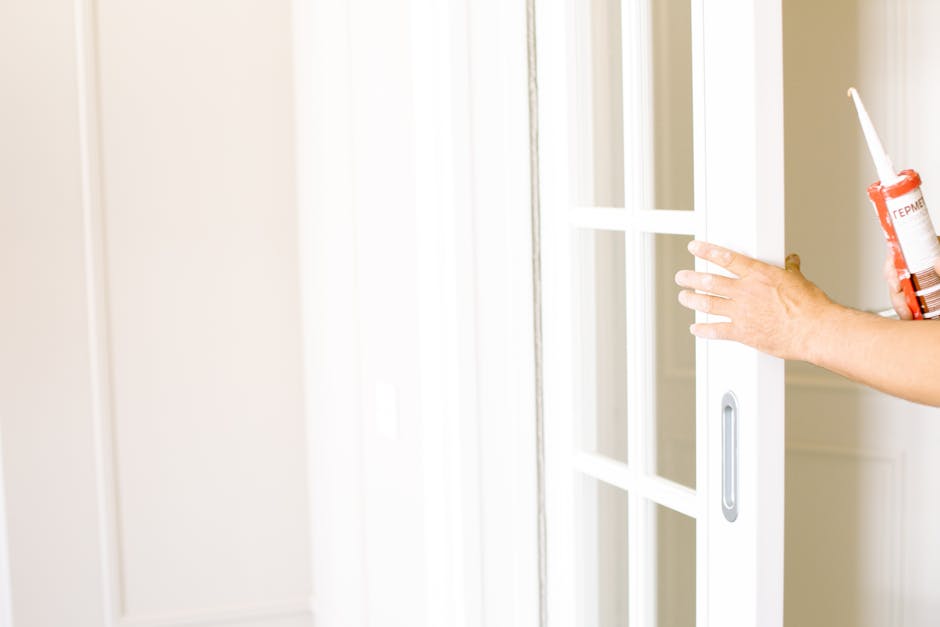
Why a small envelope punishes small leaks
Air moves through a house whether you want it to or not. In a typical residence, air leakage accounts for between 25 percent and 40 percent of the energy used for heating and cooling, and those same leaks drag down the performance of your insulation and your windows. Compress that math into 200 or 400 square feet and the effect is louder: the volume of conditioned air is tiny, so a leaky window frame or a gappy door swaps out your heated air fast.
The upside is proportional. The EPA estimates that homeowners can save an average of 15 percent on heating and cooling costs (roughly 11 percent on total energy) by air sealing and adding insulation in attics, floors over crawl spaces, and accessible basement rim joists. A tiny home does not have a basement, but it usually has a trailer frame, a subfloor cavity, and window and door perimeters that behave the same way. Sealing them is the highest-return afternoon you will spend on the place.
Read the gap before you pick a product
The single most common mistake is treating caulk as a universal filler. It is not. Caulk provides an effective, flexible seal only for cracks, gaps, and joints no more than a quarter inch wide. Push it into a wider gap and it slumps, skins over a hollow center, and tears loose within a season.
So measure first. Run a tape or just a fingertip along the joint:
- Under 1/4 inch: caulk directly. This covers most window-to-frame joints, trim seams, and the line where a countertop meets the wall.
- 1/4 inch to 1/2 inch: fill most of the depth with foam backer rod, then lay a caulk bead over it. The rod gives the sealant a backing to bond against and controls how deep the bead sits.
- A moving gap (a door, a window sash, an opening lid): that is weatherstripping territory, not caulk. Caulk seals things that stay put. Weatherstripping seals things that open and close.
Product data backs the same threshold. One popular option, GE Advanced Silicone 2 Window & Door, tells you to use backer rod for any gap larger than 1/2 inch by 1/2 inch, and it covers about 51 linear feet per 10.1 fluid ounce cartridge at a 3/16-inch bead. That coverage number is worth writing down: it lets you buy the right number of tubes instead of guessing. A tiny home with four windows and one exterior door rarely needs more than two cartridges for a full perimeter reseal.
Wait for weather the materials can cure in
Both materials are fussy about temperature, and a tiny home tempts you to ignore that because the jobs are small and you want them done. Resist. Caulk needs relatively warm conditions, above 45 degrees Fahrenheit, to set properly, while weatherstripping should go onto clean, dry surfaces at temperatures above 20 degrees Fahrenheit. Caulk applied on a cold morning will not tool cleanly and may never fully skin. Weatherstripping adhesive laid on a dusty or damp jamb will peel by spring.
Cure behavior matters just as much as application. The GE silicone above is rain-ready in 30 minutes, reaches full cure in 24 hours, carries a plus/minus 35 percent joint movement rating on glass, and holds a cured service range of minus 60 to plus 400 degrees Fahrenheit. That movement rating is why silicone shines on a tiny home: the structure flexes when you tow it or when temperatures swing, and a bead that can move 35 percent without splitting survives that abuse far better than a rigid filler.
A step-by-step around windows and doors
Here is the sequence that produces a lasting seal rather than a smear you redo next year.
- Remove the old bead. Never layer fresh caulk over cracked caulk. Slice both edges with a utility knife or a caulk-removal tool and pull the old strip out in one piece where you can.
- Clean and dry the joint. Scrape residue, wipe with rubbing alcohol, and let it dry. Silicone bonds to clean surfaces and shrugs off dirty ones.
- Back wide gaps. Press backer rod into anything over a quarter inch so the bead has something to hold.
- Cut the tip small. A 3/16-inch opening matches the coverage math and gives you a controllable bead.
- Lay one steady pass. Move at a constant speed, then tool the bead with a wet fingertip or a spoon back within a couple of minutes so it presses into the joint.
- Weatherstrip the moving parts. Add adhesive-backed foam or a door sweep to sashes and door bottoms once the surfaces are clean and dry.
A weekend scenario: the drafty loft window
Say you sleep in a loft and wake up cold on the side nearest the gable window. On a 50 degree Saturday you run a lit stick of incense around the frame and watch the smoke get yanked sideways at the lower corners: two clear leaks. The gaps measure a hair under a quarter inch, so caulk alone will handle them. You slice out the brittle old bead, wipe the channel with alcohol, and let it dry for fifteen minutes while you cut your tube tip.
One cartridge is plenty; the whole window perimeter is maybe 14 linear feet, well inside the 51 feet a single tube covers. You lay a bead down each side, tool it with a wet finger, and add a strip of adhesive foam to the operable sash so it seals when latched. By the time you climb down for lunch, the silicone is already rain-ready, and it is fully cured by Sunday afternoon. The following winter that corner of the loft stops feeling like a different room.
When it goes wrong
Sometimes the bead misbehaves, and a tiny home gives you no space to hide a sloppy repair. The usual failures have plain fixes.
If the caulk will not tool smooth and keeps stringing or dragging, it is almost always too cold or the tip is cut too wide. Stop, warm the tube and the surface above 45 degrees, recut a smaller opening, and start the pass again.
If a fresh bead pulls away from one side within days, the joint was dirty or damp when you applied it, or the gap was wider than a quarter inch with no backer rod behind it. Cut the failed bead out, add rod, and redo it. If weatherstripping peels at a corner, the surface had dust or the temperature was below 20 degrees when you stuck it down; clean the jamb, warm the room, and press the strip firmly for the full length. And if you smear silicone somewhere it should not be, wipe it immediately with a dry rag, because once it starts to skin you will be scraping it off with a blade instead.
None of these repairs cost more than a few dollars or an hour of attention. That is the quiet argument for these jobs: the materials are cheap, the mistakes are recoverable, and the payoff shows up on every heating bill and in every draft-free morning for years.
Frequently asked questions
How often should I recaulk and reweatherstrip a tiny home?
Inspect every joint once a year, ideally in fall before the heating season. Caulk that is cracked, chalky, or pulling away should be replaced right away, since a broken bead invites both air and water. High-quality silicone can last many years, but towing and temperature swings age it faster on a mobile tiny home than on a fixed house, so an annual walk-around with an incense stick or a candle to spot drafts is worth the ten minutes.
Can I use one caulk for windows, the bathroom, and the countertop?
A silicone rated for windows and doors will handle exterior and interior perimeter joints well, and many are also fine around tubs and sinks. Check the label for a mildew-resistant or kitchen-and-bath designation before using it in wet areas, and confirm the joint is under a quarter inch. For anything wider, add backer rod first regardless of the room.
Is weatherstripping or a door sweep the better fix for a cold door?
They solve different leaks, so most doors want both. Weatherstripping seals the gap around the sides and top where the door meets the jamb, while a sweep closes the gap along the bottom against the threshold. In a tiny home the bottom gap is often the worst offender because the floor and door can shift slightly on the trailer, so if you only do one thing, start with a good adjustable sweep, then add perimeter weatherstripping.
Kaushik Kyada
Keep reading

When to Repaint a Tiny Home (And When Not To)
A grounded look at interior and exterior paint timing, and the small touch-ups that delay the larger jobs.

Mold Prevention Without Industrial Chemicals
How to keep mold out of a tiny home, and what to do when small spots appear before they become a real…

Compact Plumbing: What Breaks and How to Handle It
A calm guide to the small plumbing issues most tiny homes encounter, and the few you should never DIY.