
Insulation Choices That Pay Off Slowly and Forever
 Kaushik Kyada
June 14, 2026
7 min read
Kaushik Kyada
June 14, 2026
7 min read

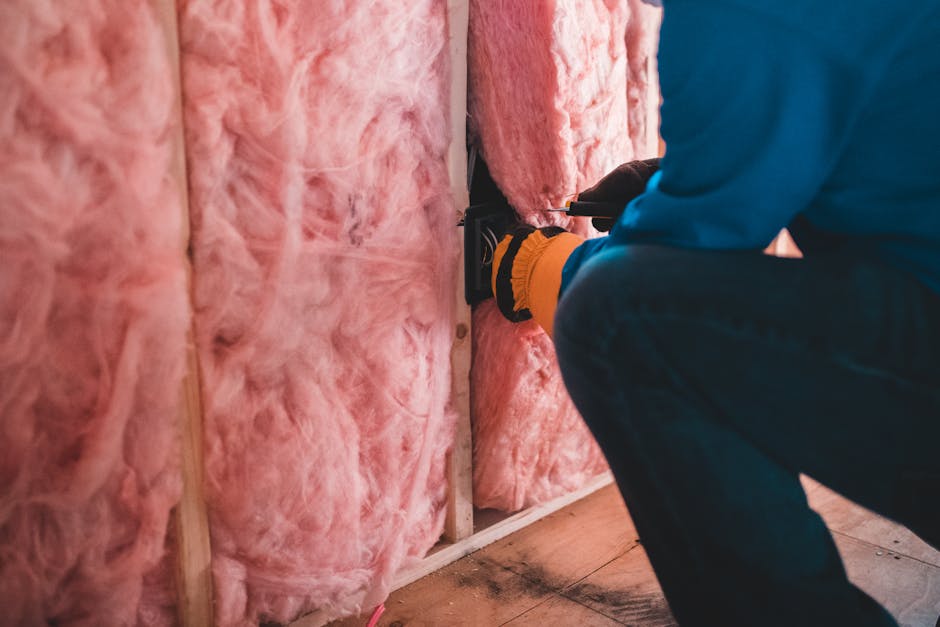
There is no thrill in choosing insulation. Nobody photographs the inside of a wall cavity, and no visitor will ever compliment it. Yet what fills those few inches of framing quietly sets your heating bill, your comfort during a July heat wave, and how the home holds value for as long as it stands. Insulation is a slow-return purchase: you pay for it once, you benefit every day after, and once the paneling or drywall goes up, changing your mind means tearing the wall back open. Getting it right the first time is the whole game.
What the code actually asks for
Before you compare materials, anchor yourself to a number. The 2021 IECC and IRC set the minimum ceiling insulation at R-60 for climate zones 4 through 8 (R-30 for zones 1 through 3), a real jump from earlier code cycles that most older tiny homes never came close to meeting. Walls carry their own target: under the same 2021 code, wood-frame walls in climate zones 4 through 8 must reach R-30 in the cavity, or hit an equivalent path such as R-20 plus R-5 of continuous insulation, or R-13 plus R-10 of continuous insulation.
If your build has a genuine vented or sealed attic rather than a cathedral ceiling, ENERGY STAR and the DOE recommend R49 to R60 for uninsulated attics across climate zones 3 through 8 (R-30 for Zone 1 and R-49 for Zone 2). That is the level worth targeting whenever ceiling depth allows it. The catch for a tiny home is that ceiling depth rarely allows it. You are working inside a box that must stay under a road-legal height, which is exactly why material choice matters more here than in any full-size house.
Why R-per-inch decides everything in a small envelope
In a conventional house, hitting a code number is mostly a matter of piling on depth: add another few inches of cheap fiberglass and you are done. A tiny home does not give you that luxury. Every inch of wall thickness is an inch of interior width you lose, and on a trailer it is also weight you tow and height you cannot exceed. So the honest question is not “which insulation is cheapest per bag” but “which insulation buys the most R-value per inch of cavity I can spare.”
Closed-cell spray foam sits at the top of that ranking. It delivers about R-7 per inch at a nominal density of 2 lb/ft3, which makes it the highest R-per-inch option for the thin cavities a tiny home is built from, and it doubles as its own air and vapor barrier. Open-cell foam is the softer, cheaper cousin, providing roughly R-3.8 per inch at a nominal density of 0.5 lb/ft3, close to half the value for the same thickness. Among rigid foam boards, polyiso offers the highest thermal resistance at about R-6 per inch, versus R-5.0 per inch for XPS and R-4.2 per inch for EPS. Ordinary fiberglass batts, for reference, land near R-3 per inch, which is why they struggle to satisfy modern code in a shallow wall.
The rule that saves the most regret: spend your insulation budget on the ceiling first, the floor second, and the walls third, because heat escapes through the top of a small heated box faster than through its sides.
Match the material to the cavity
Once you accept that R-per-inch is the currency, the choices fall out by location:
- Walls (2×4, 3.5 inch cavity): closed-cell foam or polyiso, because you cannot afford to waste an inch on air pockets or slumping.
- Ceiling (your deepest cavity): whatever reaches the highest total R, usually closed-cell foam topped or backed with rigid board.
- Subfloor over the trailer: closed-cell or rigid foam that tolerates road spray and will not sag away from the deck.
- Interior partitions: cheap batts, purely for sound, since thermal performance does nothing between two heated rooms.
A worked example in climate zone 5
Here is how the numbers land in a real build. Say you are framing an 8.5 foot wide home on a trailer in climate zone 5 (much of the Midwest and mid-Atlantic), with 2×4 walls to preserve interior width and 2×6 rafters to stay under the 13 foot 6 inch road-height limit.
Your 2×4 wall gives you a 3.5 inch cavity. Fill it with closed-cell foam at R-7 per inch and you get R-24.5 inside the framing. That alone beats the R-20 portion of the R-20 plus R-5 continuous path. Add a single inch of polyiso on the exterior (about R-6) and the assembly clears the R-20 plus R-5 requirement with margin, while that continuous layer also breaks the thermal bridge running through every stud.
The roof is where the tension in the title shows up. A 5.5 inch rafter packed with closed-cell foam yields about R-38.5, well short of the R-60 the 2021 code wants for zone 5 ceilings. To close the gap without pushing your roofline past legal height, you add rigid polyiso above or below the rafters: three inches adds roughly R-18, bringing the total near R-56. You may still finish a few points under R-60, and that is the compromise many tiny homes honestly make. The payoff is slow, but a ceiling at R-56 loses far less heat over a decade of winters than the R-19 batt a rushed builder might have stapled in to save an afternoon.
When insulation goes wrong, and what to do
Insulation fails quietly, and in a tiny home the failure shows up fast because the volume of air is so small. Three problems account for most of the trouble.
Condensation is the big one. When warm indoor air reaches a cold surface inside the wall, moisture drops out and soaks whatever it touches. If you used fibrous insulation without a proper vapor strategy, that water has nowhere to go, and you can find mold behind the paneling within a single season. Closed-cell foam sidesteps this because it is its own vapor barrier, which is a large part of why it earns its premium in a build you cannot easily reopen. If you catch a musty smell or see staining, do not just wipe it: find the cold surface causing it and correct the vapor path.
Thermal bridging is the sneaky one. Every wood stud conducts heat straight around your insulation, and in a stud-heavy tiny wall the framing can cover a fifth of the surface. If you notice faint vertical stripes of dust or condensation on an interior wall in winter, you are watching your studs telegraph the cold. The fix is a continuous layer of rigid foam on the outside, which is precisely why the code hands you the plus-continuous paths.
Settling and gaps come third. Batts slump over time, and they slump faster in a home that gets towed down the highway. Any gap wider than a coin erases the R-value in that spot. If you already have cold corners, the honest repair is rarely a patch over the finish. Pull the interior surface on the affected bay, air-seal the gaps with canned foam, then reinsulate that section properly rather than chasing the symptom room by room.
Frequently asked questions
Can I just use fiberglass batts to save money?
You can, and in a mild zone 1 or zone 2 wall it may be enough. But batts give you only around R-3 per inch, so a 3.5 inch wall tops out near R-13, below the R-30 cavity target that zones 4 through 8 require. In a tiny home the space penalty usually makes higher R-per-inch foam the cheaper choice once you count the interior width, comfort, and lower bills you keep over the years.
Is spray foam safe to install myself?
Small DIY kits exist, but closed-cell foam is unforgiving: mix ratio, surface temperature, and lift thickness all have to be right, or it cures poorly and can off-gas. For anything larger than sealing a few rim joists, hiring a professional who guarantees the cure is money well spent, especially in a sealed space you sleep in every night.
How do I find my climate zone?
The IECC climate zone map is organized by county across the US, and your local building department can usually tell you your zone in one phone call. It matters because your zone sets every target above: the same wall assembly that is generous in zone 3 can be code-deficient in zone 6.
Kaushik Kyada
Keep reading

Tiny-Home Air Quality: CO2, VOCs, and Radon in Small Spaces
A small, tightly sealed home concentrates indoor pollutants faster than any full-size house, because there is so little air to dilute them.…

LED Lighting Beyond “Just Switch Bulbs”
How thoughtful lighting design transforms a small home, fixtures, layering, color temperature, and the calm of a well-lit evening.

Compact Hot Water: Tankless, Tank, and What Actually Fits
How to choose between tankless, small tanks, and on-demand systems for a tiny home, without the marketing fog.