
Mending Clothes: A Quiet Practice
 Kaushik Kyada
July 3, 2026
8 min read
Kaushik Kyada
July 3, 2026
8 min read

A torn seam or a popped button does not have to end a garment’s life. Mending is a quietly satisfying skill that most people can pick up in a single afternoon, and it asks for very little: a small kit, four or five basic stitches, and ten minutes here and there between other things. In a tiny home, where every drawer earns its place, that small habit does double duty. It keeps clothes in rotation longer, and it spares you from replacing things you already own and already like.
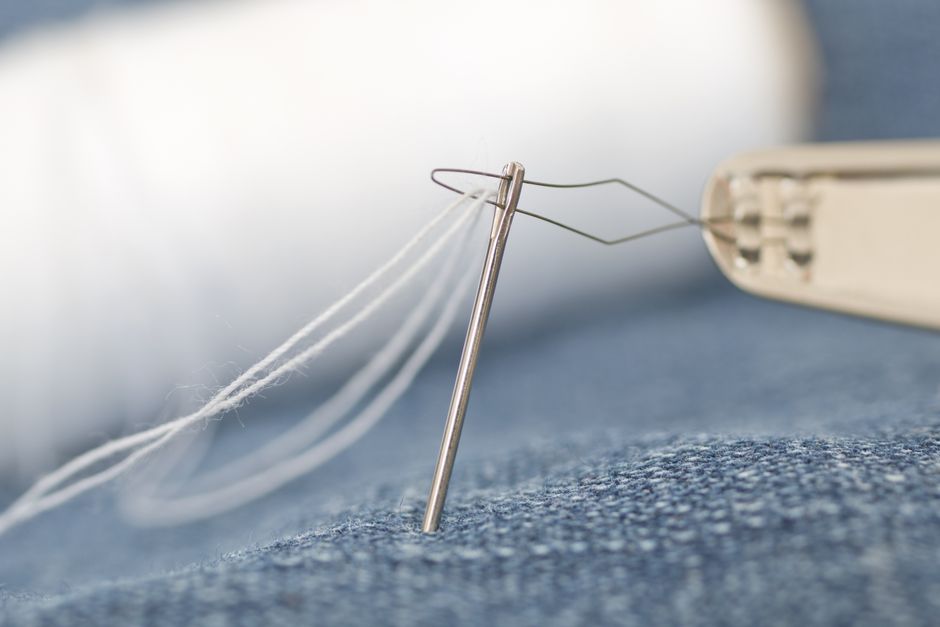
What ten minutes with a needle actually saves
The case for mending gets easier to make once you see where clothing ends up. The U.S. Environmental Protection Agency estimated that 17 million tons of textiles were generated in municipal solid waste in 2018, about 5.8 percent of the total, with discarded clothing the largest single source. Most of it never got a second life: 11.3 million tons were sent to landfills while only 2.5 million tons were recycled, a recycling rate of just 14.7 percent. The trend has been moving the wrong way, too. A December 2024 report from the U.S. Government Accountability Office notes that the EPA estimated textile waste grew by more than 50 percent from 2000 through 2018, and that in 2018 roughly 66 percent was landfilled, 19 percent was burned for energy, and only 15 percent was recycled.
Part of the problem is how briefly we hold onto things. The Ellen MacArthur Foundation reports that the average number of times a garment is worn before it is thrown out fell by almost 40 percent over 15 years, even as clothing production roughly doubled across the same period. Each of those short-lived garments carries a large hidden cost. Producing a single conventional cotton t-shirt takes roughly 659 gallons (2,720 liters) of water once irrigation, dyeing, and fabric processing are counted, according to the Water Footprint Calculator citing the Water Footprint Network. Sewing a button back on keeps that whole ledger from starting over for one more shirt.
The payoff of keeping clothes in use is also measurable at the level of a single wardrobe. WRAP found that extending the active life of a garment by an extra nine months of wear can cut its carbon, water, and waste footprints by around 20 percent each, part of an estimated £5 billion in resources saved each year. Ten minutes with a needle is one of the few environmental choices that also puts money back in your pocket.
A mending kit that fits in a jar
You do not need a sewing box the size of a shoebox. A pint jar or a flat pencil case holds everything for the repairs that come up most often, which matters when floor space is scarce. Stock it once and you can forget about it until something tears.
- Hand-sewing needles in two or three sizes, plus one larger needle with a big eye for thick thread or wool.
- All-purpose polyester thread in black, white, gray, and navy. These four cover the majority of everyday clothes.
- A few buttons saved from worn-out garments, and any spare buttons that came stitched inside new clothes.
- Small scissors or a thread snip, plus a handful of safety pins.
- A thimble for pushing needles through denim or canvas, and a needle threader if your eyes appreciate the help.
- Iron-on patches or scraps of matching fabric for covering holes rather than just closing them.
If you want one upgrade, add a small darning egg or even a smooth lightbulb. It holds the shape of a sock or a sleeve while you work over a hole, which makes the repair far tidier.
Four stitches that handle most repairs
Almost every common repair comes down to a handful of moves. Practice each once on a rag and you will have them for good.
The running stitch is the simplest: pass the needle in and out along a line, keeping the gaps even. Use it for quick tacking and for gathering loose fabric. The backstitch is your workhorse for seams that carry strain. You take one stitch forward, then bring the needle back to meet the end of the previous stitch, which builds a strong continuous line that resists pulling apart. The whipstitch loops over the edge of the fabric again and again, and it is ideal for closing a split seam or joining two edges. The button stitch is just several passes through the same holes, finished by winding the thread around the base to make a small shank so the button sits and fastens cleanly.
For holes rather than seams, learn one more: darning. You lay a grid of threads across the hole in one direction, then weave the needle over and under them in the other direction, building a small patch of new fabric where the old wore through. It is the classic fix for a worn heel or elbow.
A Tuesday night with a split jeans seam
Say the inner seam of your favorite jeans lets go at the thigh on a Tuesday evening. Here is the whole repair, start to finish, in about twelve minutes.
Turn the jeans inside out so the split faces you. Cut a length of thread about the span of your forearm, thread the needle, and knot both ends together so you sew with a doubled thread for strength. Line up the two edges of the torn seam the way they were originally joined, and pin them if they drift. Start a centimeter before the tear, where the old stitching is still holding, so your new work overlaps the strong part. Work a backstitch along the seam line, keeping your stitches small and close, roughly two to three millimeters apart. When you reach a centimeter past the far end of the tear, sew back over the last few stitches to lock them, then knot off close to the fabric and snip the tail.
The goal is not an invisible repair. It is a seam that outlasts the rest of the jeans and disappears the moment you turn them right side out.
Turn the jeans back the right way, press the seam flat with your fingers or a warm iron, and they are ready to wear the next morning. Total cost: a few inches of thread and the time it takes to watch part of an episode.
When a repair goes sideways
Not every mend goes cleanly the first time, and that is fine. A few common problems have quick fixes:
- The fabric puckers or bunches. Your stitches are too tight or spaced unevenly. Snip the thread out, smooth the fabric flat, and redo the line with a looser, steadier hand. Pinning first prevents most of this.
- The thread keeps knotting as you sew. You are probably pulling too much length through, or the thread is twisting. Work with a shorter piece, and let the needle dangle now and then so the thread untwists itself.
- The hole is too big, or the fabric around it is thin and rotten. Stitching alone will tear again. Back the area with an iron-on patch or a scrap of matching fabric on the inside, then stitch through both layers so the patch carries the load.
- The mend is somewhere it will show, like the front of a shirt. Lean into it instead of hiding it. A neat patch in a contrasting color, or a small line of visible stitching, reads as intentional and beats sending the shirt to a bin.
If a garment is genuinely beyond saving, it still does not have to go in the trash. Cut it into cleaning rags, save the buttons and any usable zippers for your kit, and take worn textiles to a dedicated textile-recycling drop-off rather than the curbside bin, given how low the recycling rate still sits.
Frequently asked questions
How long does it really take to learn to mend?
An afternoon is enough to get comfortable with the four core stitches and to fix your first real garment. You will not be fast at first, and your early seams will look a little uneven, but function comes before neatness. After five or six repairs the movements become automatic, and a button or a small seam stops feeling like a project and starts feeling like a ten-minute chore you barely notice.
Do I need a sewing machine for basic repairs?
No. Almost everything covered here is faster to do by hand than it would take to set up a machine, and hand tools store in a jar rather than a cupboard, which suits a small space. A machine earns its keep if you start hemming, altering, or making clothes from scratch, but for buttons, split seams, and holes, a needle and thread do the job well.
Which clothes are worth mending, and which are not?
Mend anything you like wearing and anything made from decent fabric, especially natural fibers and sturdy weaves like denim, wool, and canvas. These reward the effort and can be repaired many times over. Very thin, low-quality knits that are already pilling and going see-through are the poor candidates, since the fabric around any new stitch tends to give out next. When in doubt, try the repair anyway: the thread costs almost nothing, and a saved garment keeps its water and carbon footprint from being spent all over again on a replacement.
Kaushik Kyada
Keep reading
A Tea-and-Coffee Setup That Doesn’t Cost the Earth
A small-home approach to morning beverages that minimizes packaging, energy, and the slow accumulation of single-use anything.

A Small-Home Sunday That Sets Up the Week
A loose Sunday routine that resets the home, the kitchen, and the calendar, without sacrificing the day off.

Sustainable Cleaning That Actually Cleans
A short, no-nonsense guide to simple, effective cleaning supplies that don’t come with a strong smell or a long ingredient list.